


Hot diggity dog! I’m back with another quick and easy #RBDNotSoBasic project.
I designed this beginner friendly foundation paper pieced block to celebrate my obsession with candy canes.
But why stop there?
Why not continue to make this versatile FPP block and table runner to celebrate all seasons?
And that’s what I did. Hehe.
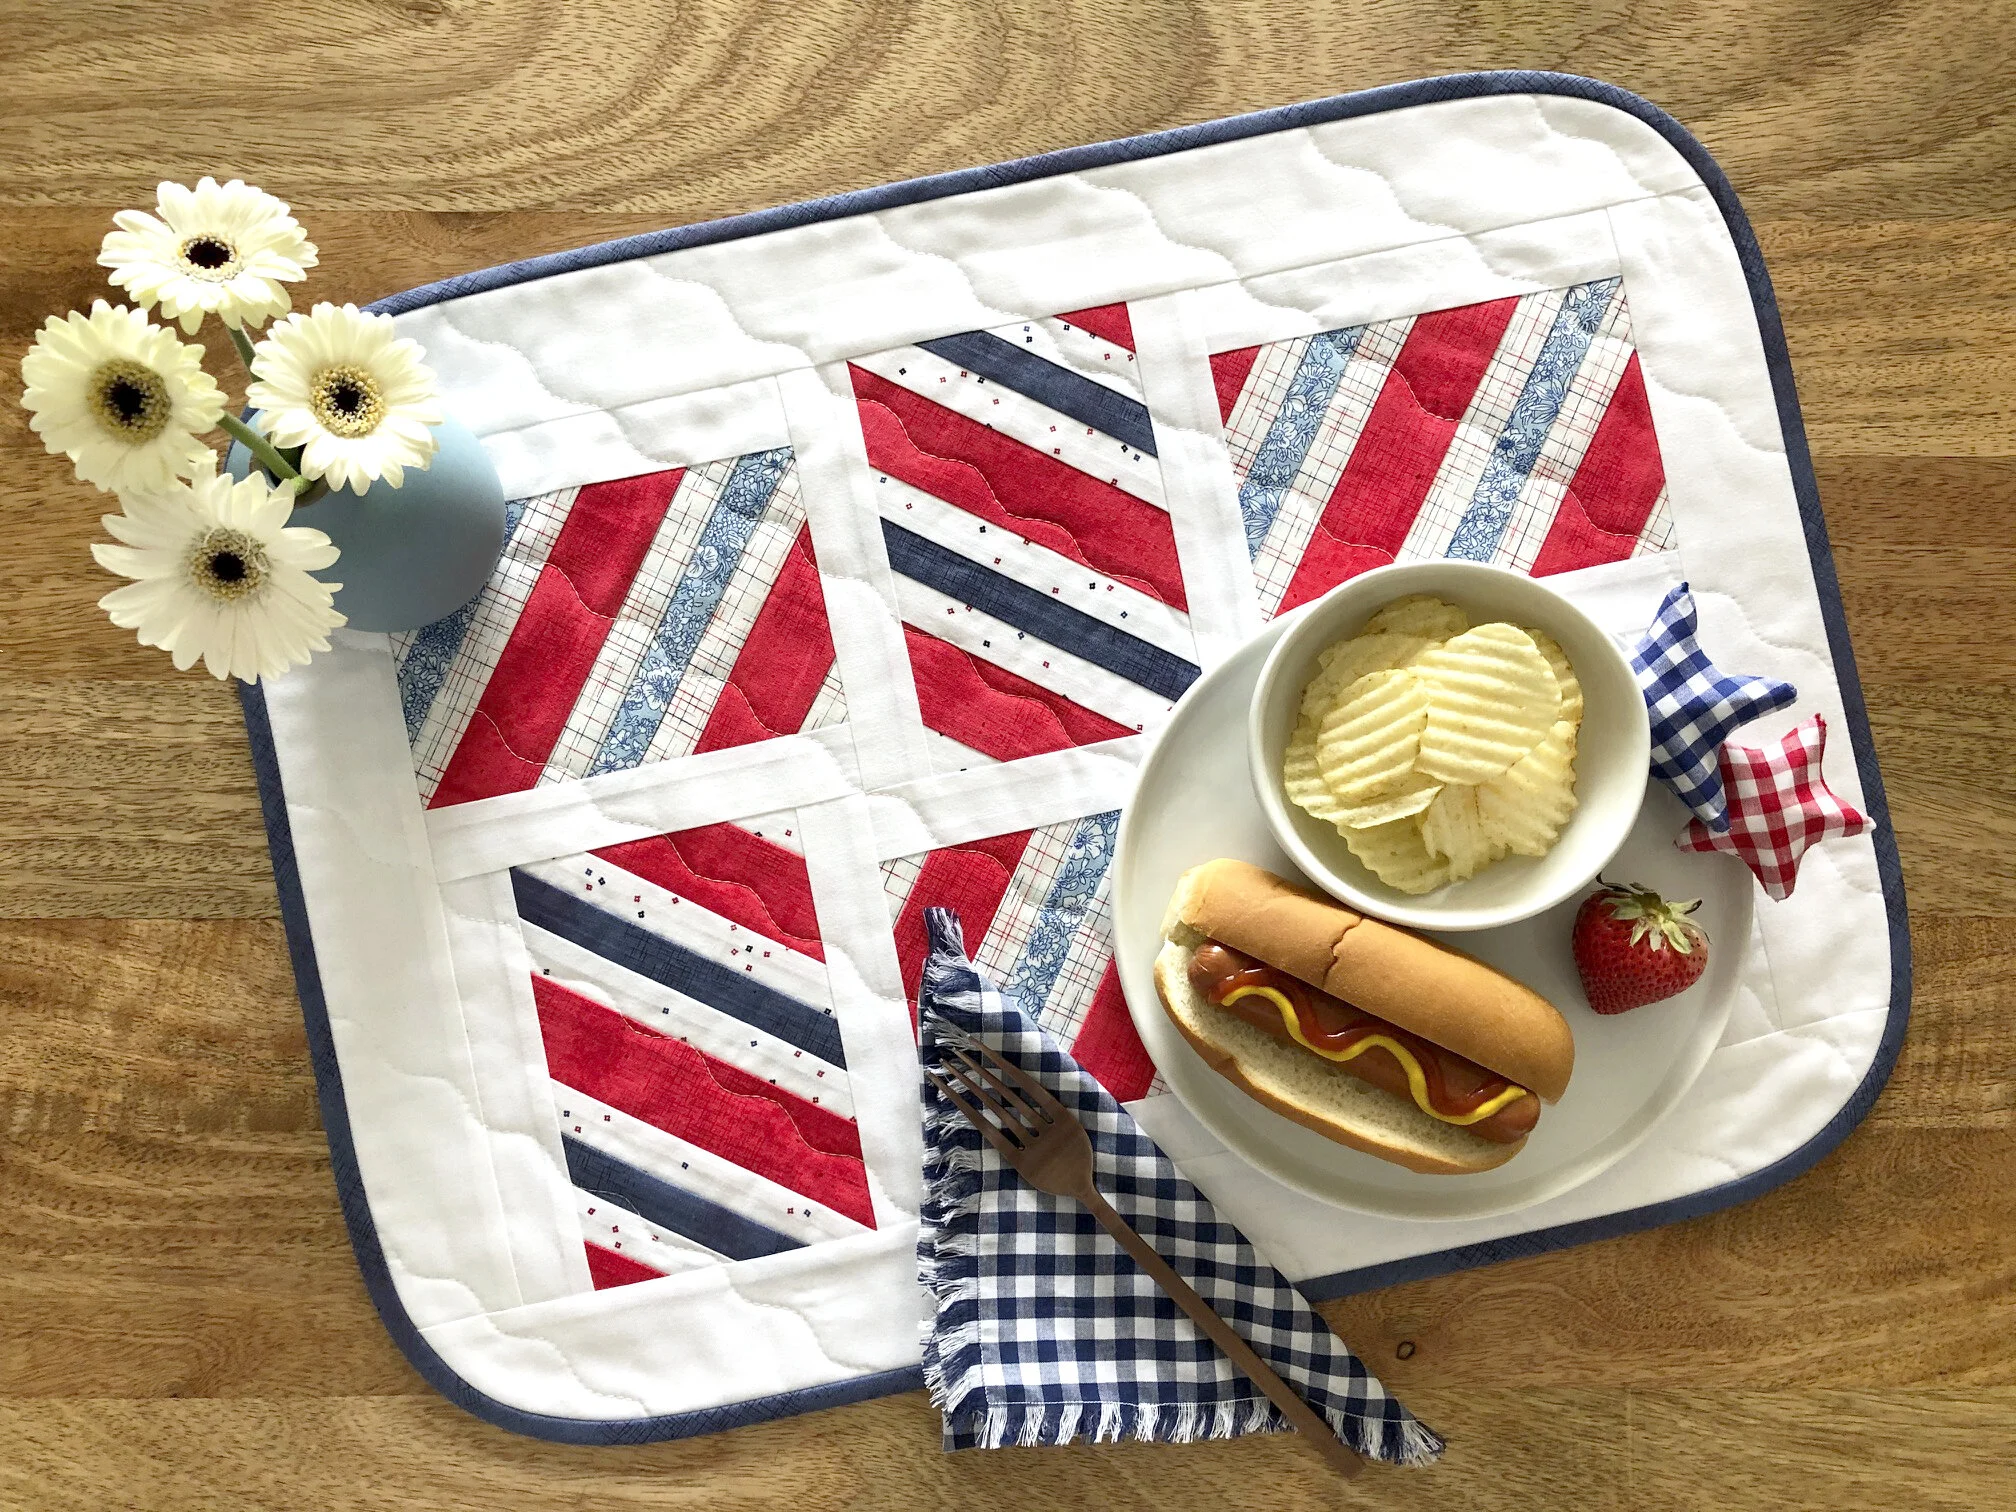
I made another version using some of my favorite Riley Blake Design’s basics.
Blossom (US)
Shabby (Cherry and Denim)
Confetti Cottons (Riley White)
Gunny Sack (Patriotic)
Hashtag (Navy on White)
and a touch of Liberty’s Flower Spring Market (Because, why not?!)
This block is scrap friendly but works with fat quarters as well. It can stand alone or in multiples, like in this adorable table runner. There’s sashing built into the block design, how rad is that?
If you’re new to foundation paper piecing or FPP, don’t worry. There are some amazing tutorials online. Do a quick search and find a method that works best for you!
You’ll need to make six RWB Stripe blocks for this table runner. You can purchase the template here.
You also need to cut the following from background fabric:
Cut 2 (2 1/2’’x 12 1/2’’ rectangles)
Cut 2 (2 1/2’’ x 22’’ rectangles)
You’ll also need a 20’’ x 26’’ piece of batting and a 20’’ x 26’’ backing rectangle.
After making the 6 blocks, you’ll need to sew the following:
With a layout you prefer, sew the 6 blocks together.
Press seams towards the sashing.
Sew a 2 1/2’’ x 12 1/2” rectangle to the left and right of the block section.
Press seams towards the background fabric.
Sew a 2 1/2 x 22’’ rectangle to the top and bottom of the block section.
Press seams towards the background fabric.
Quilt and bind as desired.
Finished size is 16’’ x 22’’
I’m a creature of habit and used my BabyLock Journey, masking tape, and Aurifil Monofilament Thread, to create a wavy quilt pattern on this RWB table runner. If you want to learn more about why I use masking tape, you can watch my Fat Quarter Shop video here.
And are you surprised? I made another project with rounded corners. Hehe.
I use my handy-dandy June Tailor Round the Corner ruler for the corners and bias tape for the binding.
Take your time sewing the binding to the front of the quilt. I use the Baby Lock 1/4’’ Quilting or Patchwork Foot with Guide and sew really slow. I almost always hand-stitch the binding to the back of then quilt when use have rounded corners.


But wait, there’s more!
I decided to make matching cloth napkins using Riley Blake Designs Woven Gingham in navy.
Start with a 14’’ square.
With a 1.4 stitch length, sew 1/2’’ around the entire square.
With a straight pin or seam ripper, fray the edges.
So cute, right? I can’t wait to see your RWB Stripe blocks and project.
Tag me in your photos and follow the #rbdnotsobasic hashtag to see more awesome projects.
cut, sew, repeat…
the tattooed quilter